Managing personnel access is a critical aspect of running an efficient and secure business, and Repairdashboard gives you all the tools you need to stay in control. As the manager and account holder, you have full authority to grant and customize access for your team. This means you can decide exactly who can see or do what within your account, helping you maintain security and streamline your workflow.
In this guide, we’ll walk you through everything you need to know to manage personnel access in Repairdashboard. Whether you’re looking to set up new users, customize permissions, or simply learn how personnel access works, you’ll find simple steps and practical tips to make the most of this essential feature.
How to Effectively Manage Personnel Access in Repairdashboard
It is really important to manage personnel access in Repairdashboard as it is essential for maintaining both security and efficiency within your business. In this section, you’ll learn the practical steps and best practices for controlling who can view or modify different areas of your Repairdashboard account. We’ll cover everything from initial setup to customizing permissions for various team members, so you can ensure your staff has access only to the tools and information they need. By following these guidelines, you’ll create a more organized and secure workflow for your entire team.
Adding Personnel to Manage Access in Repairdashboard
Adding personnel to your Repairdashboard account is the first step in delegating tasks and sharing responsibilities with your team. This section will guide you through the process of inviting new team members, assigning them appropriate roles, and specifying which sections they can access. With Repairdashboard, you can easily expand your team as your business grows, while keeping control over who has access to sensitive data and business functions. Detailed instructions will help you set up new users smoothly and ensure everyone is set up for success.
- To start, go to the “Users” menu, select “Access” Service and click on “New”.
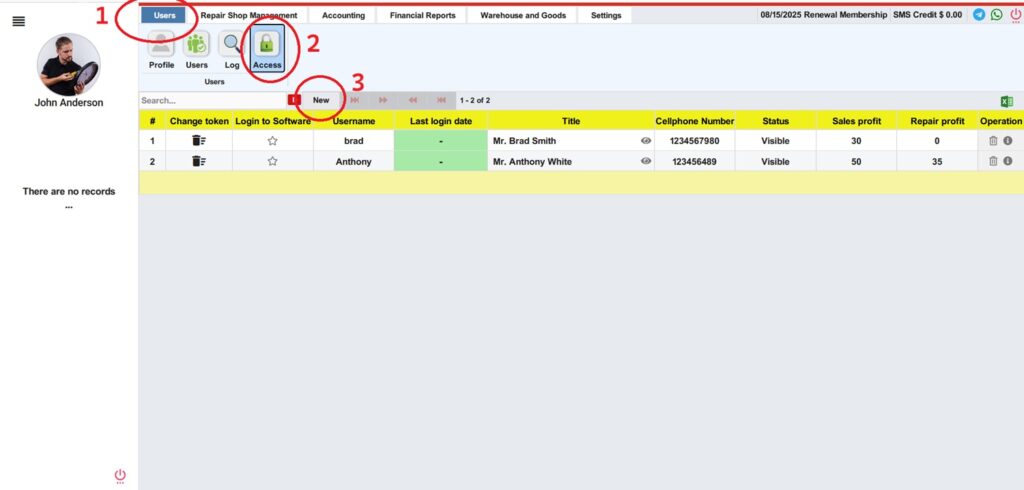
- Fill out all the required details.
- In the ‘Config Home Page’ section, first select the service your personnel should see when they log into their panel.
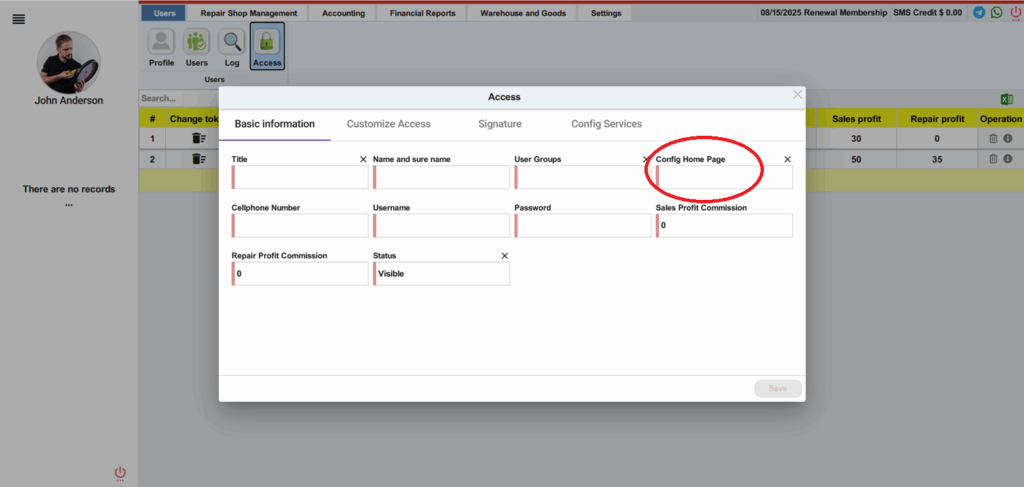
For example,
- Technicians can be directed to the ‘Ticket’ service, so that they can immediately issue repair tickets for customers.
- Salespeople can be directed to the “Sales” service, streamlining their workflow.
Customizing Access Permissions in Repairdashboard
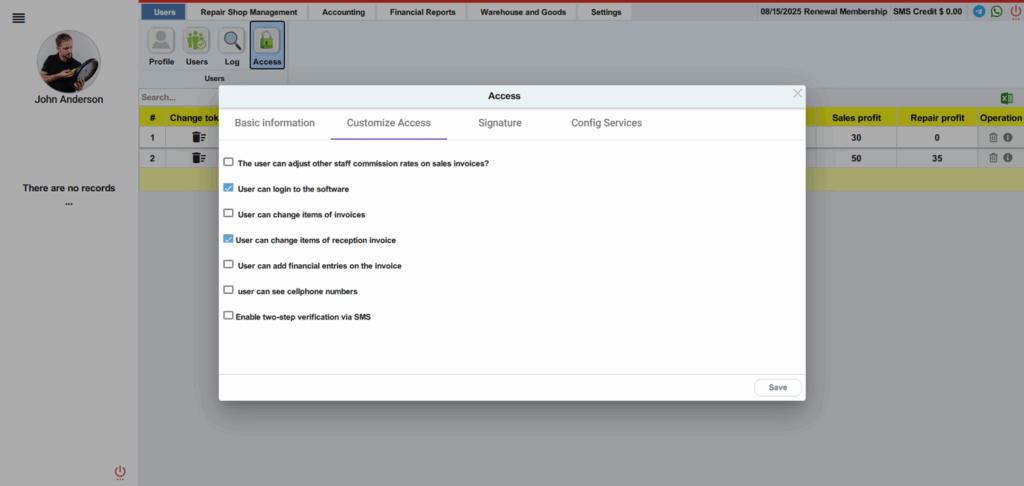
The “Customize Access” tab in Repairdashboard is designed to give you precise control over what each team member can do within your system. Instead of providing all users with the same level of access, you can customize permissions based on their specific roles and responsibilities. This means you decide who can view sensitive information, make financial changes, adjust invoice items, or use security features like two-step verification. By tailoring these settings, you not only protect your business data but also help each staff member stay focused on the tasks that matter most to them.
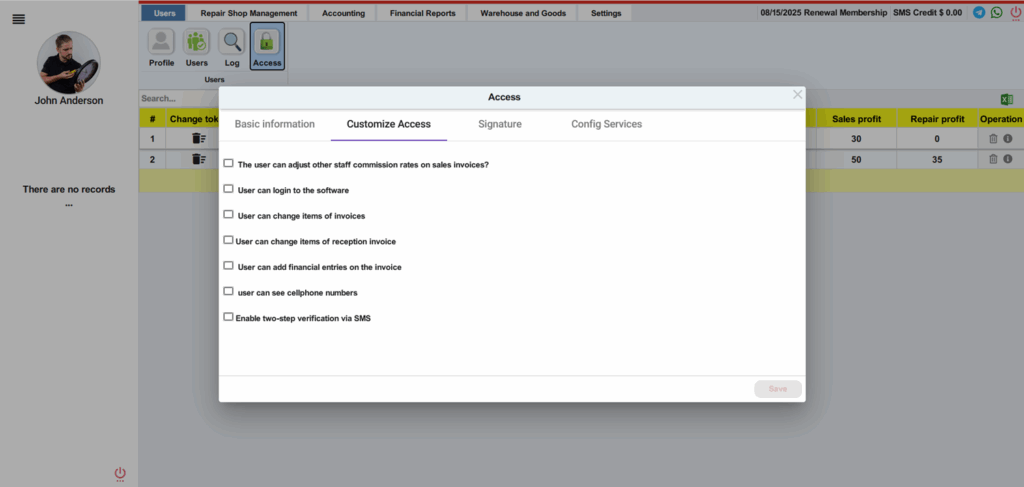
- Check or uncheck any of the options for your personnel.
Adding a Signature
- In the “Signature” tab, upload your personnel’s signature.
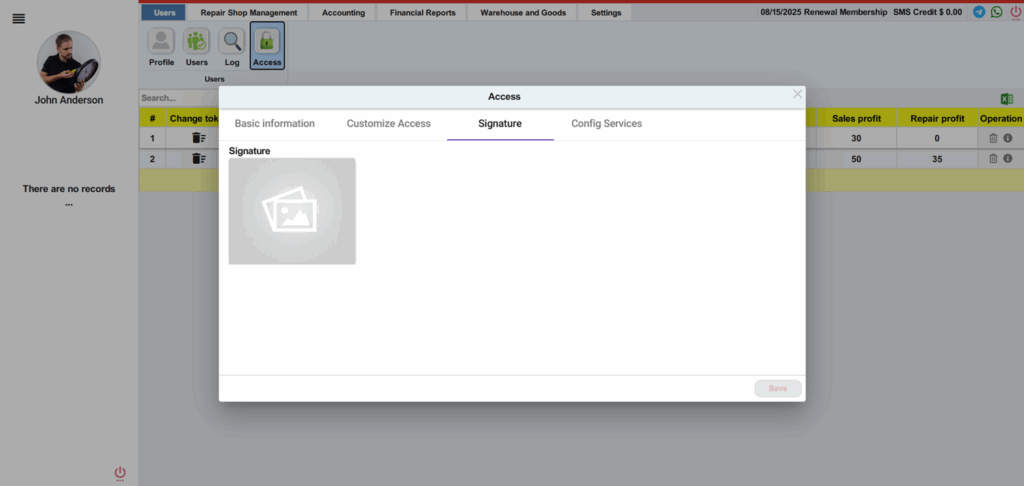
- This allows their signature to appear automatically at the bottom of invoices for sales or services they handle.
Configuring Services for Personnel Access in Repairdashboard
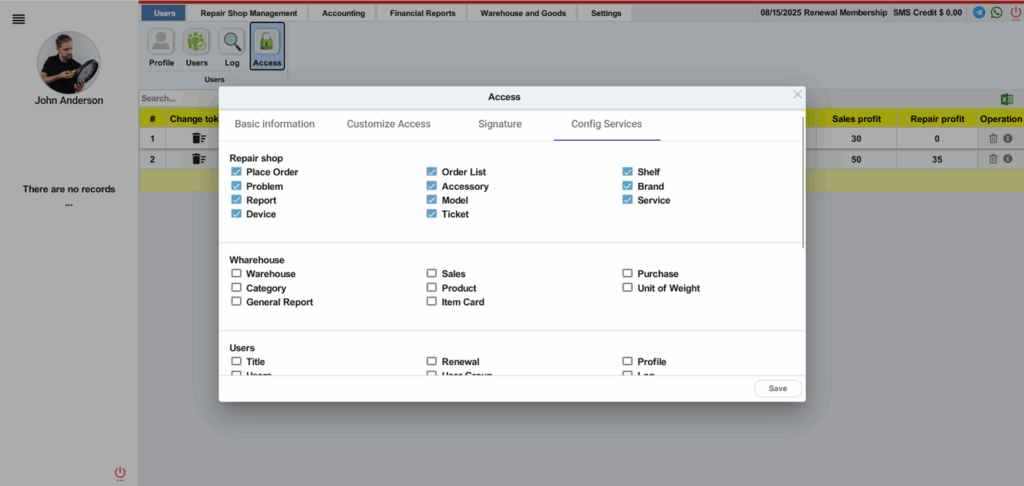
After setting individual permissions, you can further manage personnel access in Repairdashboard by configuring their available services. The “Config Services” tab lets you choose which modules or sections—such as sales, inventory, or repair management—each team member can use. This makes it easy to tailor access for different roles, ensuring that staff only see and interact with the services relevant to their job. By enabling or disabling specific services, you keep your workflow organized and maintain better control over your business operations.
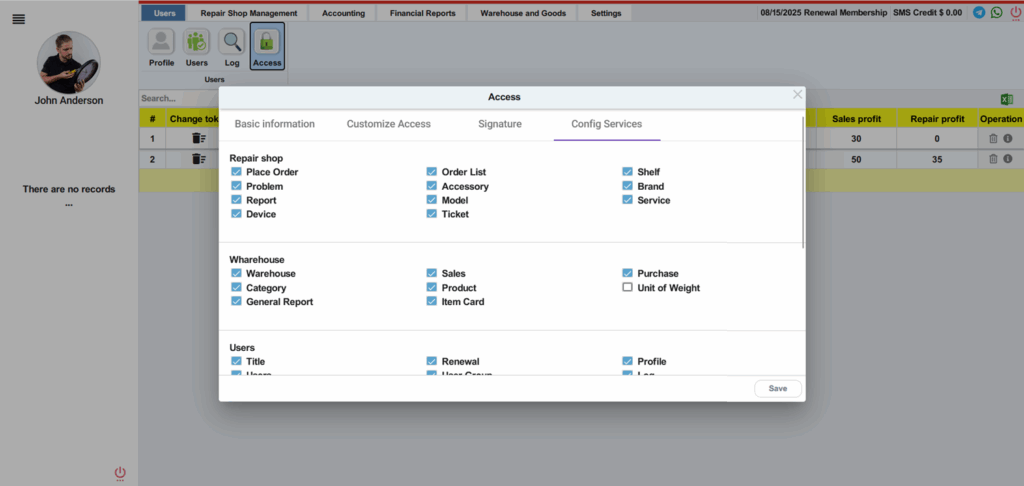
- Check or uncheck the services your personnel need access to.
- For instance, you might activate Sales and Inventory Management for a salesperson, whereas you would deactivate irrelevant services like Repair Management.
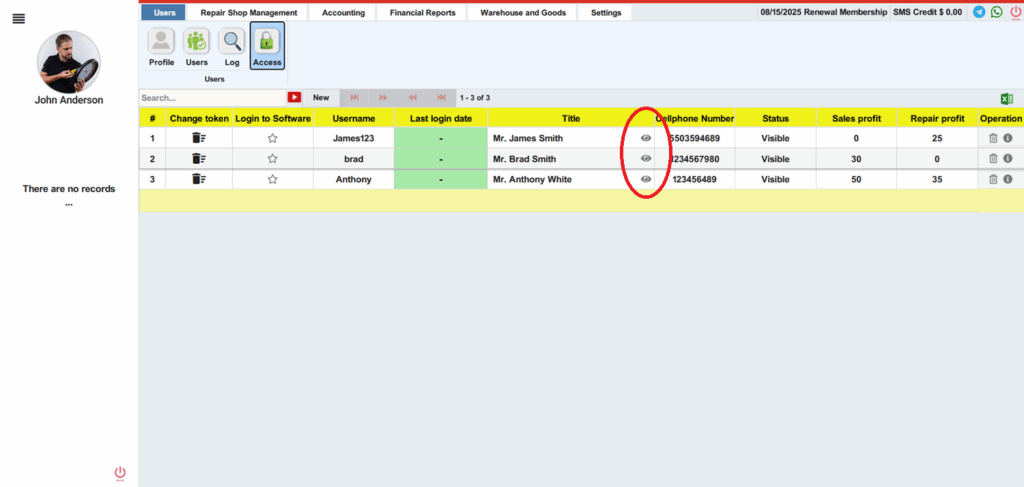
As the manager, you can preview how these configurations affect your personnel’s panel by logging into their account directly. Just click on the eye icon next to their name.
Viewing Personnel Panels
When you log in to a personnel’s panel in Repairdashboard, you will only see the services and menus assigned to their specific role. This feature is an important part of how you manage personnel access in Repairdashboard, as it allows you to preview exactly what your team members experience when they use the platform. By viewing personnel panels, you can verify that each user has access only to the necessary tools and information, ensuring both security and efficiency. This step also helps you identify if any permissions or services need to be adjusted, so you can continue to effectively manage personnel access in Repairdashboard as your business needs evolve.
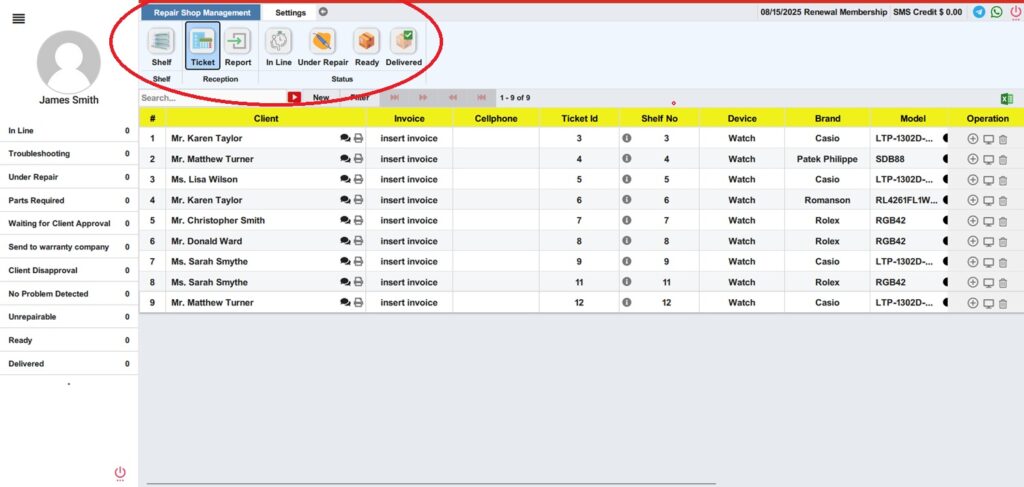
- Use the arrow icon to return to your manager account.
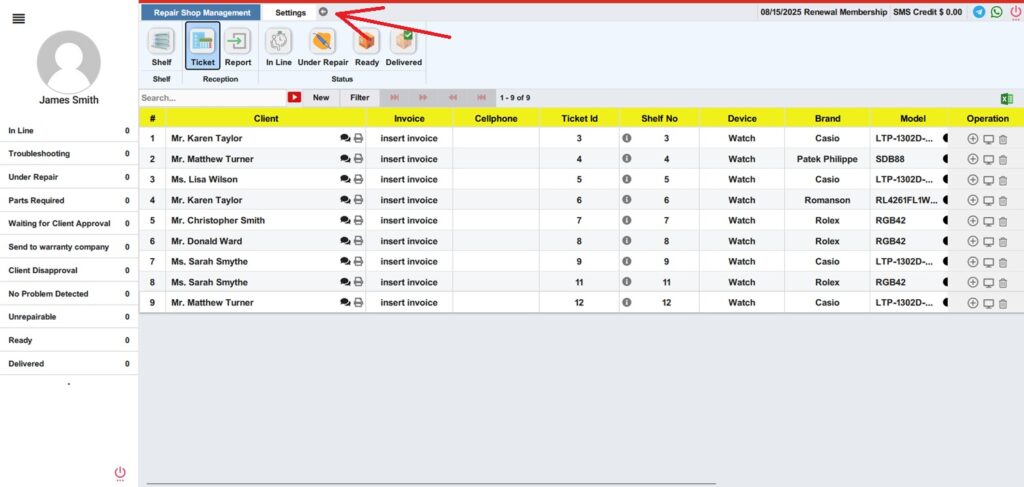
This ensures your team has tailored access, improving efficiency and security.
Important Notes
- While you can restrict your personnel’s access, you cannot limit access for your own account as the manager. However, if certain menus or services (such as repair shop management) are not relevant to your business, you can contact Repairdashboard support to have them deactivated.
- Activating or deactivating menus is free of charge.
Overall, granting and managing personnel access in Repairdashboard is straightforward and highly customizable. By taking advantage of these tools, you can ensure your team only sees the functions and information they need. This not only increases productivity but also helps safeguard your business data, allowing your staff to focus on the tasks that matter most to your business success.
Key Benefits of Configured Personnel Access in Repairdashboard
When you manage personnel access in Repairdashboard and configure each user’s permissions, your business gains several important advantages:
- Efficiency: By customizing access, personnel see only the information and features relevant to their role. This reduces clutter, minimizes confusion, and helps your team complete tasks faster.
- Security: Managing personnel access in Repairdashboard ensures that sensitive data and business operations are only accessible to authorized team members. This protects your business from errors or unauthorized actions.
- Flexibility: As your business grows or your needs change, you can easily add, remove, or adjust access for personnel in Repairdashboard. This means your system adapts with you, whether you’re expanding your team or updating responsibilities.
When you take the time to properly manage personnel access in Repairdashboard, you streamline your team’s workflow and maintain greater control over your business operations. Start optimizing your team’s performance with Repairdashboard today!
Additionally, you can learn how Repairdashboard automatically calculates staff commission. Check out our guide on 5 Steps for Quick Commission Salary Calculation